Quilting on the Curve
Quilting on the Honey Quilt has commenced.
On most of the quilts I have made in the last few years I have used concentric circles or curves to accentual the gradations of color in my pieced blocks.
I am usually making blocks with rectangular strips in the log cabin style which can feel sort of rigid on their own. The contrasting curved lines of stitching visually softens the over all affect.
For the honey quilt I have two different iterations of the same block repeated throughout the quilt. I decided to use different curve spacing for each of the two types of blocks.
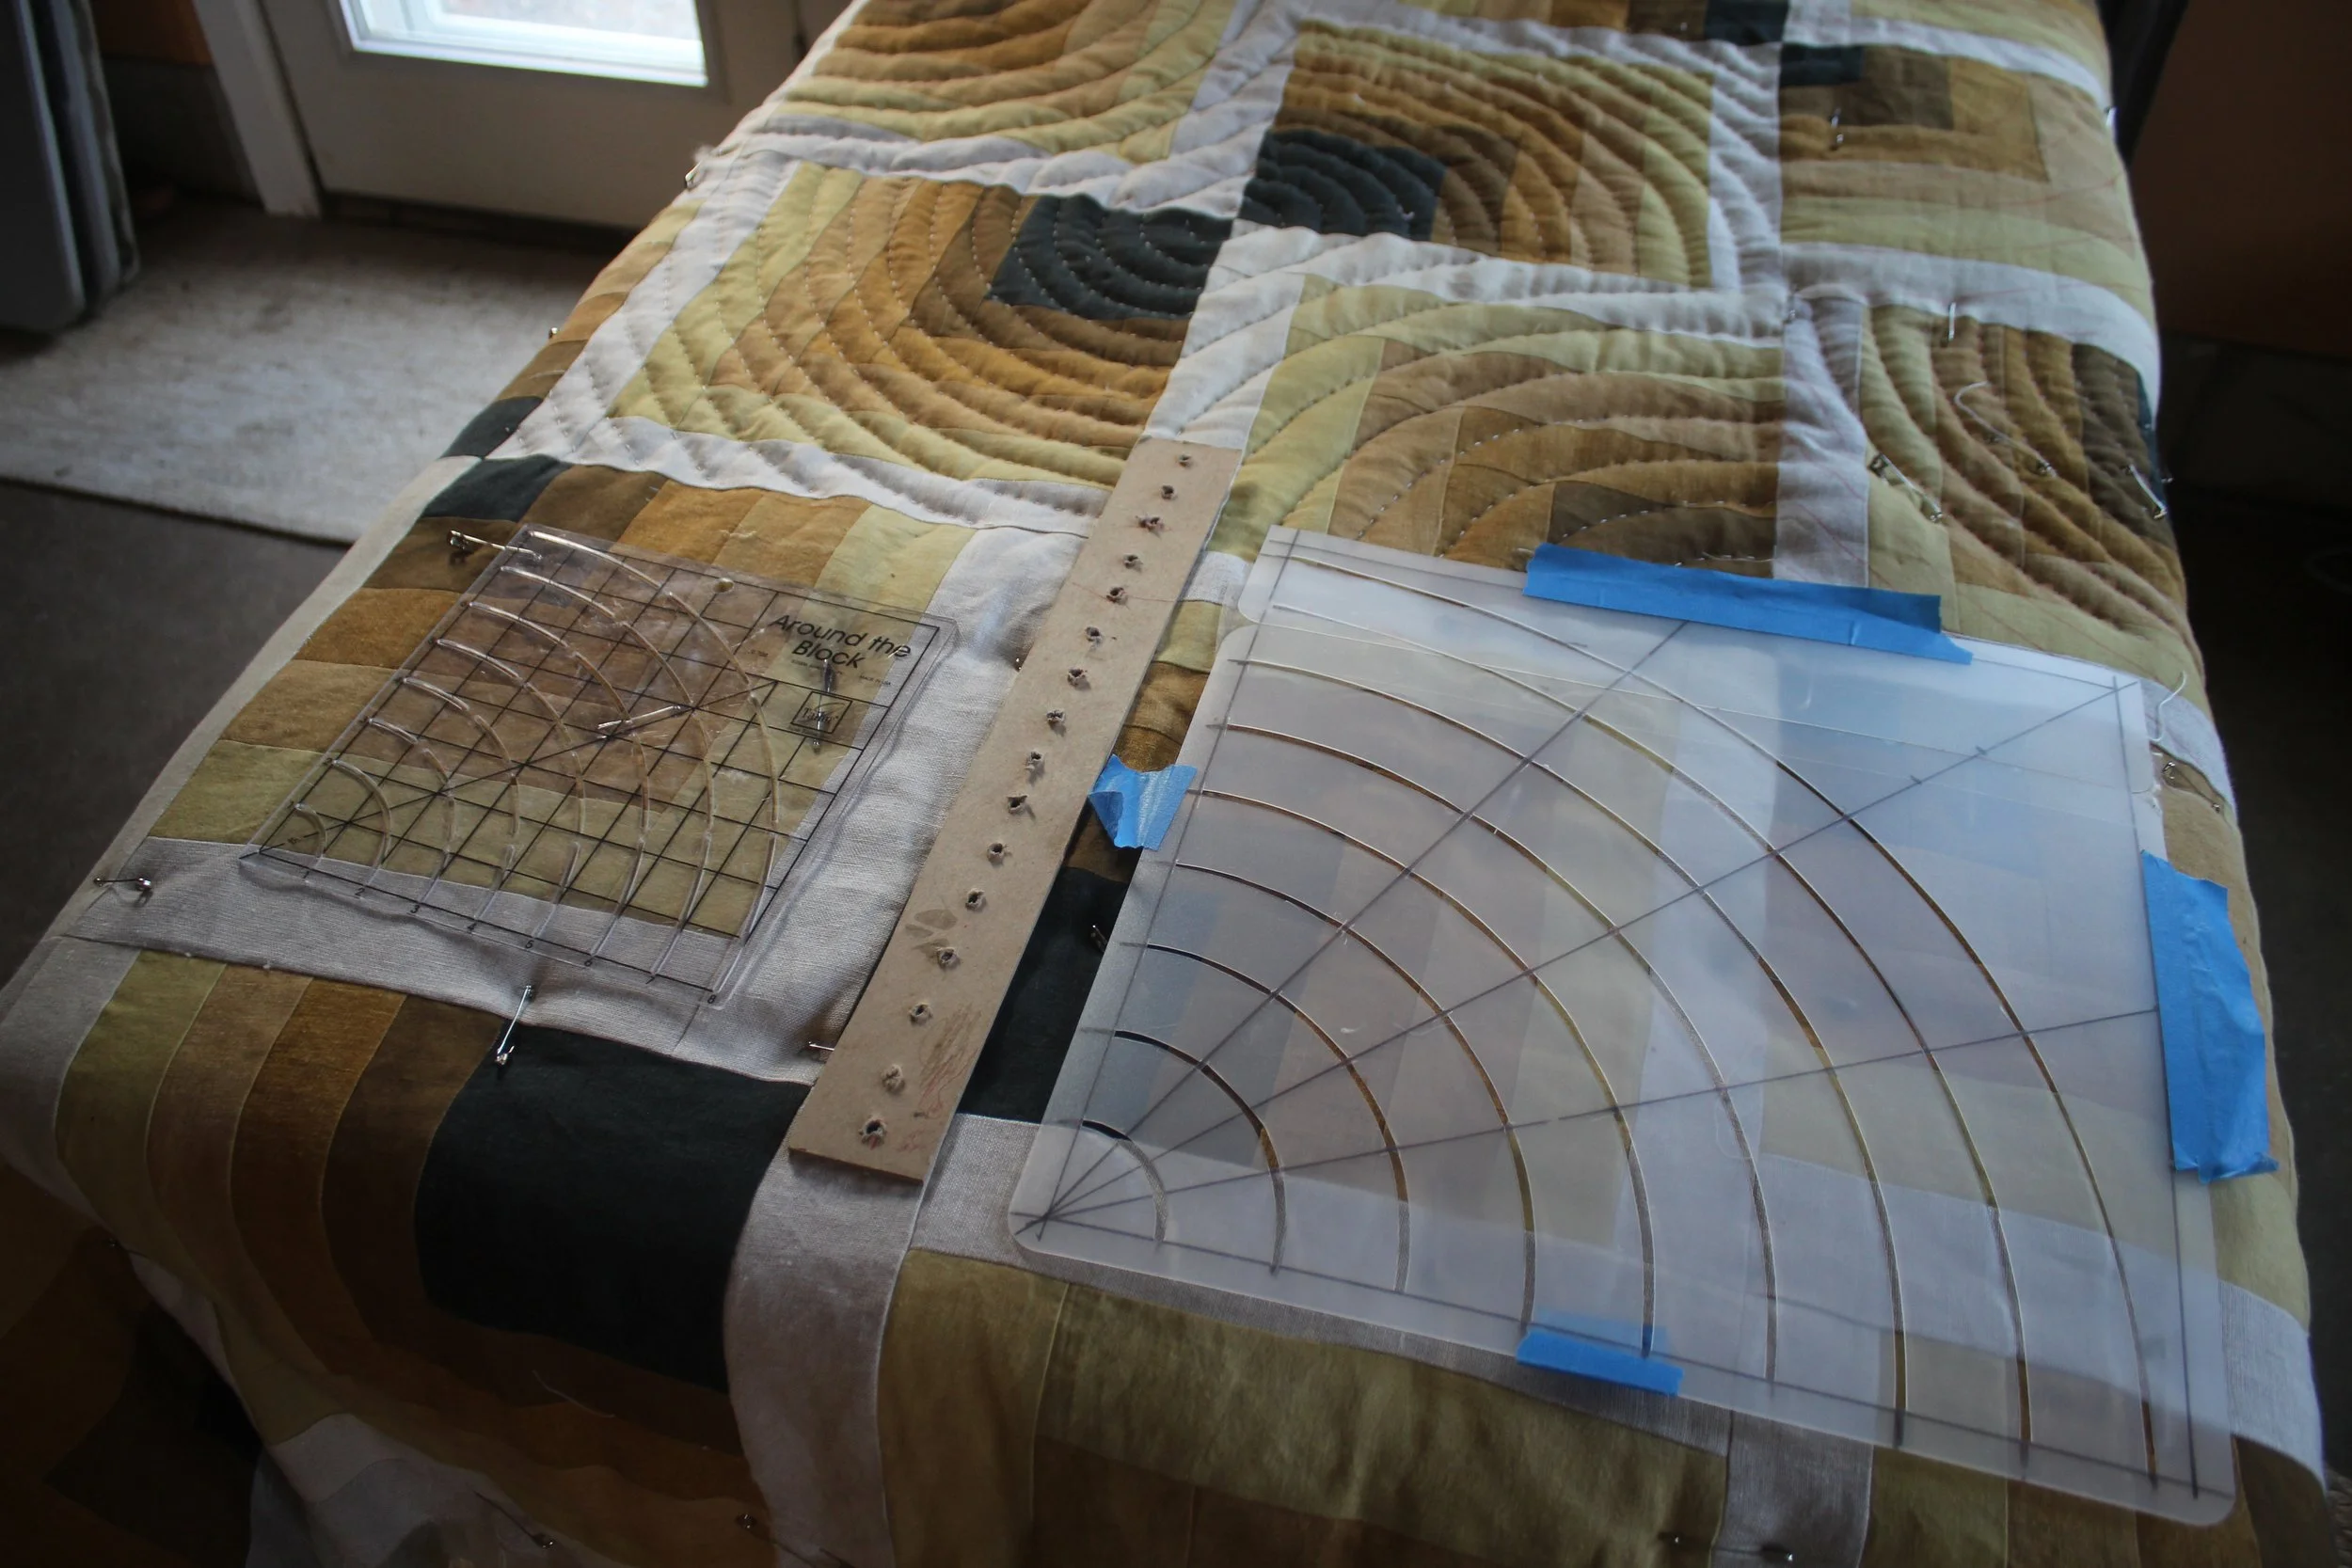
There are many ways to make the curved lines. For this quilt I am using a quilting stencil I purchased at a craft store, a basic diy protractor made with book board and diy stencil I made for a previous quilt from a thin plastic cutting board mat.
I am currently working through a large stash of heat erase pens to draw my quilting guidelines. Unfortunately, they create way too much single use plastic waste so I will not purchase those again. What’s enticing about the heat erase pens is that you can draw out a lot of lines at once and the lines wont rub off as your work your way through the quilting. Alas, when my current supply of pens run out I will be returning to my chalk based marking tools.
With linen you can also use a bone folder or the dull edge of a butter knife etc. to create a burnished guide. I haven’t found a good tool to make the burnished line when using the protractor method.